The Hidden Mitre Joint
Furniture generally has the back side against a wall or another piece of furniture so you don’t have to worry how the back and sides are joined. The Chest Lamp has all edges exposed so we chose the 45-degree rabbet joint or hidden mitre joint to hide all the edge joinery.
The dynamics of the hidden mitre joint:
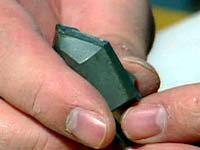
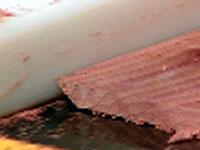
This joinery has the back with a 45-degree cut along the edge. The sides have a rabbet (vertical cut) with the same 45-degree cut to match the back piece. When the joint is put together the edge grain of both the side and back is hidden by the 45-degree angle. See photo

Tools required:
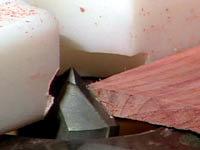
Tools required to make the hidden mitre joint is a Router table and fence, and a V-groove bit. This V-groove bit has a long 90-degree cutting edge not common on most V-groove bits. See photo
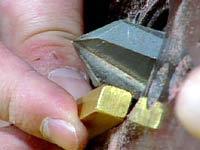
Mounting and setting the height of the V-groove bit:
The first step is to mount the V-groove bit in place and set the height of the bit for the side cut. To determine this you must subtract the thickness of the side (3/4”) from the thickness of the back (3/8”). The bit height is based on this difference (3/8”). Therefore the shoulder height of the bit is 3/8” above the plate. For easy measurement use the 3/8” brass bar. It’s that simple! See photo
Next is the distance from the fence:
First clamp the out-feed side of the fence in place. Move the in-feed side until the distance on the 45-degree angle of the cutter matches the top surface of the side piece. When positioned correctly the cut will come to a sharp point.
Making the cuts:
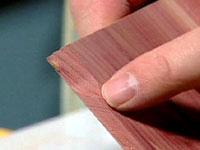
Before we make the cut we need to mark right and left on the side pieces. This is the best way I know to keep from making two right or two left pieces! To do this put the two sides together with the rabbet and dado cuts to the inside. Mark the two edges with a pencil mark. You are now ready to make the first cut! See photo

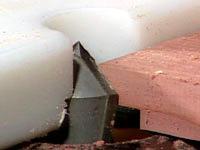
The last cut is the back:
To do the back cut we need to set up the height the V-groove bit to a full 45-degree cut. Make a test cut to be sure the height is accurate before starting on your project pieces. See photos.
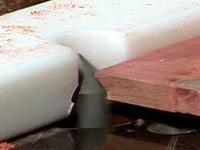
The assembly:
The last step is to assemble the back and sides together. See photo
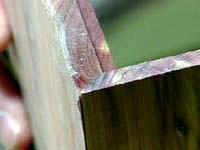
You have now completed a hidden mitre joint that can be used on many of your projects!