Making an inlay with your router
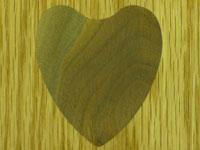
Introduction: Many simple projects can be made fancy with an inlay design applied in a contrasting wood or other materials. The snack tray we have illustrated in this project is made of ash wood with walnut hearts inlaid in the corners. The Router Workshop Series 100 Episode #112, Decorative Inlays, shows you how to make an inlay.
The procedure outline:
The procedure for inlay work is very simple if a few important details are taken care of before you start.
1) your router bit must be in the center of the router guide;
2) the wall thickness of the inlay bushing must be the same as the diameter of the bit;
3) use the exact same pattern when making the inlay cavity and the plug.
Step 1 Setting Up The Tools:
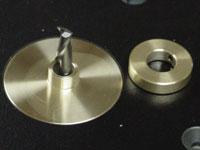
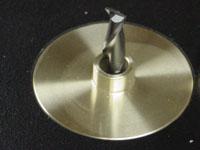
Mount a 7" base plate on your router and use the aligning pin in the chuck of the router along with the 7/16" guide. This will ensure your base plate is centered as you tighten it into place. Fasten the 7/16" guide to the 7" base plate with the ring nut. Place the 1/4" inlay bushing over the guide flange and tighten the set screw. Remove the aligning pin and chuck up a 1/4" spiral bit in the portable plunge router.

Step 2 Position The Pattern And Set The Depth:
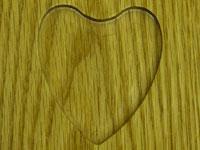
For this inlay we positioned the heart pattern at a 45-degree angle, across the corner of the tray material using the shop made corner fixture. See Router Projects Volume 1 for the plans of the corner fixture.
Bottom out the bit and then set the depth of cut to slightly less than the thickness of the inlay material. (The material we are using for this project is 1/4".)
Step 3 Cutting The Cavities:
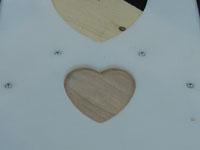
With the bushing in place start the router and rout heart cavities in the four corners of the tray. Be sure to make a clean cavity with a smooth bottom. You will have to vacuum or brush the chips out of the cavity. If chips get between the bit and the bushing wall, you will not get a clean heart-shaped cavity. Continue to rout the cavity until you are satisfied with the smooth bottom and the heart shape.
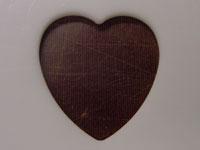
Step 4 Making Inlay Plugs:
The inlay material is only 1/4" thick. Double stick tape your wood onto a piece of scrap plywood. You will use the same heart pattern to cut the plug. Secure the pattern in place with double stick tape. Remove the 1/4" bushing, bottom out the bit and set the depth of cut to slightly more than the inlay material.

Rout the inlay plugs moving in a counter clockwise direction. Be sure to keep the router guide tight to the pattern to ensure you will have the perfect inlay plug. You may want to sand the underside of the plugs before placing in the cavities. Glue the plugs in place and sand smooth.
Tools Needed:
Portable Plunge Router, 7" Base Plate, 7/16” Brass Guide, Guide Ring Nut, Aligning Pin, 1/4” Inlay Bushing, 1/4” Spiral Cutter, Pattern Of Your Choice.