Hanging A Plaque!
After getting a request to make 100 plaques we had to make a jig to cut the slot in the back to hang the plaque. Today's tip will cover this jig.
Project Planning
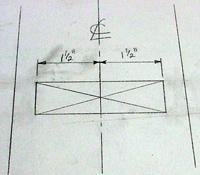
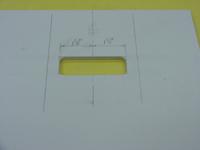
We chose a 1" guide and a 3/8" key hole cutter to make our slot. Use masonite to layout the 1" x 3" cut-out for the guide to follow.
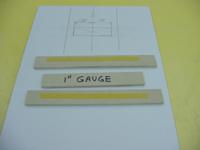
Next cut 1" wide strips that will be attached to the masonite with double stick tape. This will be the support for the flush trim bit when making the 1" x 3" cut-out.
Set-Up
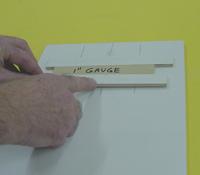
Attach the long strip on both the top and bottom line of the cut-out. Use a 1" spacer to make certain the 1" guide fits properly. Then attach two shorter strips at either end of the 3" cut-out.
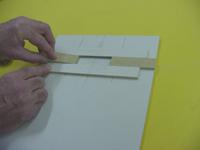
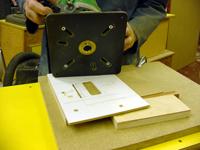
Drill a hole and cut the 1" x 3" opening with a flush trim bit in a table mounted router.

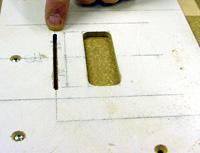
We then made a saw cut in the jig so that we could check the plaque was always tight to our support under the jig before making the key hole slot.
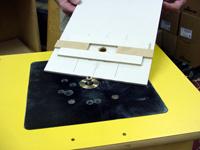
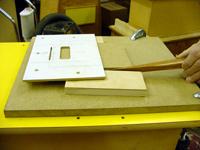
Cut the masonite jig to suit your plaque size and screw to a piece of 90 degree material as shown.

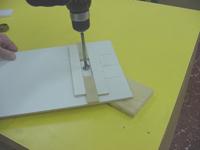
Making The Cut
After sliding the plaque into the 90 degree jig we held it in place with a wedge. Using the 1" guide and the 3/8" key hole cutter, set the depth of cut to 3/8". Plunge down at one end of the slotted opening, drag to the other end, slide back and bring the bit out the same hole.

Tip: Use a shop vacuum to remove the dust from the recessed slot after each cut.